Jan 15, 2011

Virtualbox 4.0: SCSI-Controllers and sharing host directories

In december 2010 Oracle released Virtualbox 4.0:


Very nice is the new preview window inside the manager window:
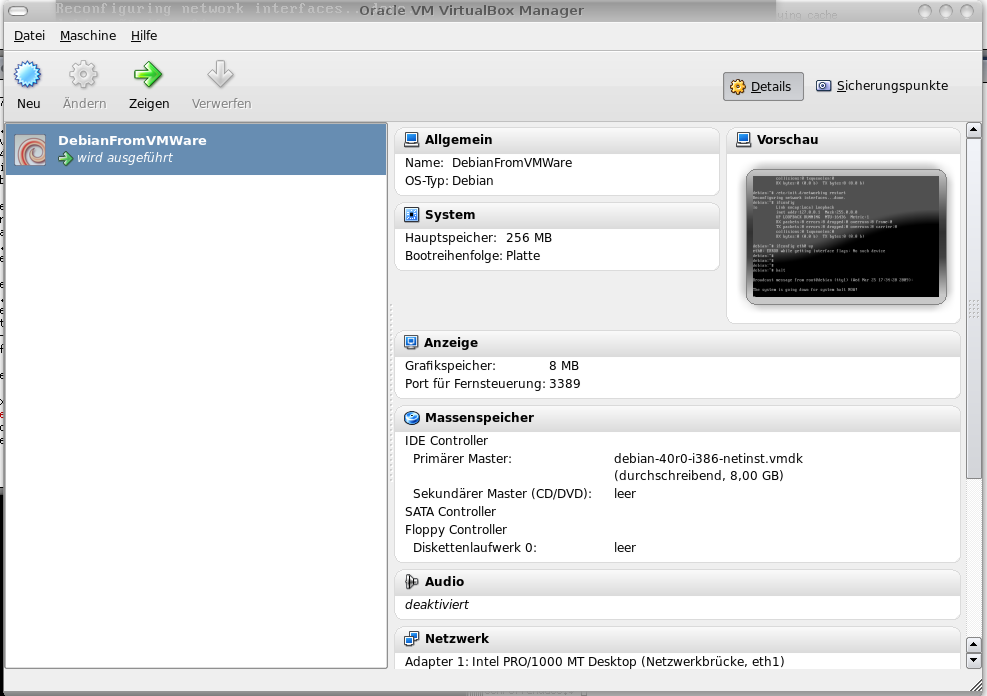
There are several new features with version 4. In my opinion new hdd controllers and sharing host directories with guest machines are very important enhancements, which were missing in oder version.
The following screenshots show how to configure these new features:
IDE, SCSI and SATA controllers can be configured via:

with using the icon which opens the following drop down menu:


With 4.0 it is possible to share host folders with the guest machines. Just follow these steps:


But i got:
mount.vboxsf tmp2 /tmp2
/sbin/mount.vboxsf: mounting failed with the error: No such device
But this is due to the fact, that the guest system failed installing the guest additions and so the appropriate kernel modules were missing ;-(.
After some additional work (installing kernel-headers, etc.) everything worked well....


Dec 30, 2010

Review at amazon: Getting Started with Oracle BPM Suite 11gR1 – A Hands-On Tutorial

Last two weeks i read "Getting Started with Oracle BPM Suite 11gR1 – A Hands-On Tutorial" and played with the examples given in this book.

On the packtpub website the following can be found about this book:
What you will learn from this book :
  • Build a business process application
  • Model executable processes with Business Process Modeling Notation (BPMN) 2.0
  • Optimize your processes using process simulation
  • Analyze activity with Process Analytics and Business Activity Monitoring
  • Integrate business decisions with Business Rules
  • Design complex Human Task flows
  • Develop rich forms for BPM
  • Collaborate with Process Spaces (Social BPM)
  • Explore life-cycle management features


What they are not telling is, that this book contains many step by step examples with excellent screenshots. For this reason it is very easy to follow all the steps to set up a running BPM Suite (The installation process is described very detailed for windows) and get a process running.
On more than 500 pages you can find a short introduction in BPMN 2.0, Installation, BPM Studio, Roles, Simulation, ....
If you are interested, take a look at my review at amazon.de (like all my reviews: written in german ;-).

Sep 28, 2010

Oracle BPM: How to use start and end events

For modelling a process you have to configure your Jdeveloper 11g like shown in this posting. Then you can create easliy a process like this one:

[The behaviour of the tool palette is a little bit weird, because you can not use drag&drop. You have to click an item and then move the mouse inside the graph. Then the item is beneath the mouse cursor and you can place it with a second click.]

The start event can be changed via right mouse click:

[The start event with the envelope is called "message start event"]

Here an excerpt from the official documentation about the start events:
The none start event is used when no instance trigger is defined. Process analysts can use the none start event as a placeholder when the necessary start event of a process is unknown or is defined and implemented later by process developers. None start events are also used to specify the beginning of a process where the process instance is created by another flow object. Although the none start event does not trigger the creation of a process instance, it is required when triggering a process instance using the following flow objects:
  • Receive task. The receive task must have the Create Instance property set to true.
  • User task implemented with the initiator pattern
The message start event triggers a process instance when a message is received. This message can be sent from another BPMN or BPEL process or from a service. Messages are types of data used for of exchanging information between processes. Just as data objects are used to define the data used within a project, messages are used to define the data used between processes or between a process and a service.
You can exposed a BPMN process as service which enables other processes and applications to invoke the process. To expose a process as a service, your process must begin with a message start event.

The signal start event is similar to a message start event in that it is based on communication from another process or service. However, the message start event responds to a message sent to a specific process. In contrast, the signal start event is a response to a signal broadcast to multiple processes. Signals can be broadcast from a BPMN process using the signal throw event. Using a combination of signal throw and signal start events, you can invoke multiple processes simultaneously.

The timer start event triggers the creation of a process instance based on a specific time condition. You can configure the timer start event to trigger a process instance based on the following:
  • A specific date and time. For example, a process could be triggered on December 31, at 11:59 PM.
  • A recurring interval. For example, a process could be triggered every 10 hours, 5 minutes, 32 seconds.
The following end events can be used:
  • None end event
    like start event
  • Error end event
    Errors end events are normally used with the error boundary event. The error
    boundary event is used to alter the process flow based on a specific error. This flow usually ends using an error end event.
  • Message end event
    like start event
  • Terminate end event
    The terminate end event is used to immediately terminate a process. When a terminate end event is reached, the process ends immediately. There is no error handling or additional clean up performed.

Sep 19, 2010

Fritz!Box: New firmwares with IPv6-support!

Last week AVM released some new firmwares including IPv6-support. After running the online update my Fritz!Box 7270 showed the following version:

[54.04.86]
But how to activate IPv6? After some clicks i found the this tab:

Per default the IPv6-support is switched off:

After activating this checkbox the following options are shown:

That's all.
Now you can use IPv6 for your lan at home and first check is opening the Fritz!Box webinterface via IPv6: